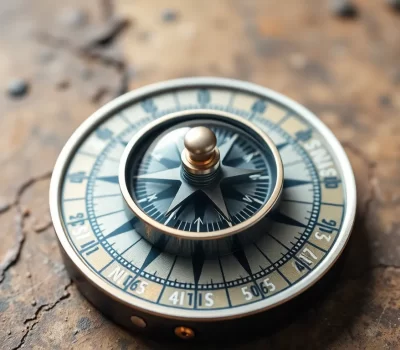
How Is a Compass Made? Materials and Manufacturing Process

A traditional magnetic compass is made by forming and magnetizing a lightweight needle or magnetic card, mounting it on a low-friction support, enclosing it inside a graduated housing, adding damping when the design requires it, sealing the assembly, and testing its accuracy. Industrial compass production is more precise than a simple classroom experiment: the magnetic element must retain its polarity, the housing must avoid unwanted magnetic interference, the dial must be aligned correctly, and the moving parts must rotate without sticking. Manufacturing methods vary among baseplate, lensatic, marine, dry, and liquid-filled compasses, but all designs must satisfy the same basic functional requirements.
Table of Contents:
Background: Functional Requirements of a Magnetic Compass
Every manufacturing decision begins with what the finished compass must do. Its magnetic element must respond consistently to Earth’s magnetic field, rotate with very little resistance, and settle in a stable position that can be read against a dial or index line. The pivot or support must keep the moving element centered, while the housing must protect it without introducing significant magnetic interference.
Dry compasses allow the needle or card to move in air. Liquid-filled models use a transparent damping fluid to reduce oscillation and improve readability, which adds requirements for sealing and temperature compensation. The detailed physics behind needle alignment, magnetic north, declination, and reading errors are explained separately in our guide to how a magnetic compass works. This article focuses instead on the materials, production stages, assembly methods, and factory testing used to build the instrument.
History of Compass Manufacturing
From Lodestone to the Magnetized Needle
The earliest directional devices used lodestone, a naturally magnetized form of magnetite. Historical designs included magnetized pieces that were suspended, balanced, or placed so they could turn. Later, a magnetized iron needle could be floated on a small support in water or suspended from a thread, reducing friction enough for it to align with the magnetic field.
The development of the dry compass placed a magnetized needle or compass card on a central pivot inside a protective case. This arrangement was more portable than a water bowl and made it easier to add a fixed index, directional markings, and protection from wind. The broader progression from lodestone to navigational instruments is covered in the history of the magnetic compass.
From Handcrafted Instruments to Modern Production
Early makers worked with wood, bronze, brass, iron, paper, and glass. As metalworking improved, pivots became finer, bearings became harder and smoother, and engraved degree scales became more consistent. Sealed housings protected the moving parts from dust and moisture, while liquid damping made portable and marine compasses easier to read in motion.
Modern manufacturing replaces many hand-fitted parts with stamped needles, molded polymer capsules, printed or laser-marked dials, standardized bearings, and repeatable assembly fixtures. Precision models may still require individual balancing and adjustment, but mass production allows manufacturers to control dimensions, polarity, sealing, and dial alignment more consistently.
Raw Materials Used to Make a Compass
What Is a Compass Needle Made Of?
A compass needle is usually made from magnetizable steel or another material capable of retaining permanent magnetization. The exact alloy depends on the design and manufacturer. It must combine sufficient magnetic strength with low mass, mechanical stiffness, corrosion resistance, and dimensional stability. Not every stainless steel grade is suitable because some grades respond weakly to magnetization.
The needle may receive a protective coating, paint, plating, or an oxide finish. Its north-seeking end is commonly distinguished by red paint, luminous material, a contrasting shape, or another visible mark. Some compasses use small permanent magnets attached beneath a lightweight compass card instead of a separate needle.
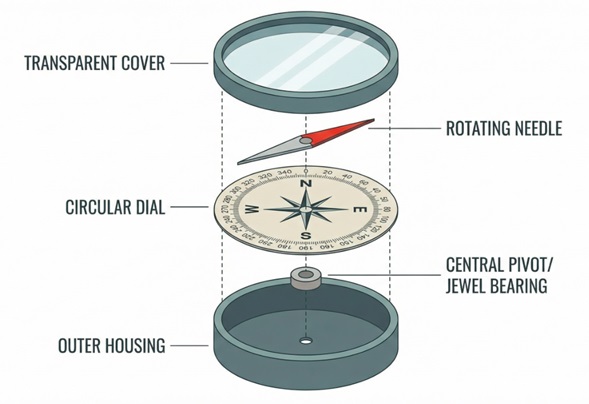
Housing, Dial, Pivot, and Damping Materials
Portable housings and capsules are commonly made from molded transparent or opaque polymers. Aluminum, brass, and other suitable nonferrous metals may be used where strength, appearance, or precision machining is important. The cover is often acrylic, polycarbonate, mineral glass, or another transparent material that protects the interior without obstructing the reading.
The pivot is typically hardened and finely finished, while the bearing may use a hard metal surface, a synthetic jewel, or another low-friction material. Dials and compass cards can be molded, printed, engraved, etched, or assembled from several layers. Liquid-filled models use a clear damping fluid formulated for stable movement across the intended temperature range. Gaskets, adhesives, welded joints, crimped rims, or molded seals keep the liquid inside and contaminants outside. Dry compasses omit this liquid and may use air or mechanical damping instead.
The Compass Manufacturing Process
Although production methods differ among compass types, most traditional magnetic compasses are manufactured through three main phases: making the magnetic element, producing the housing and reading components, and assembling the finished instrument.
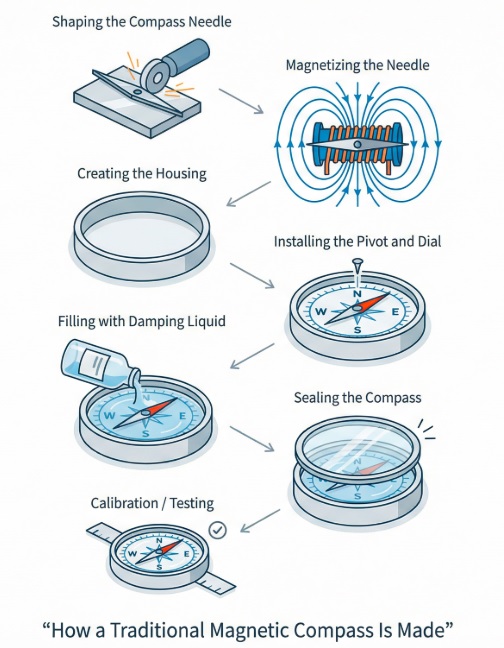
Making the Needle
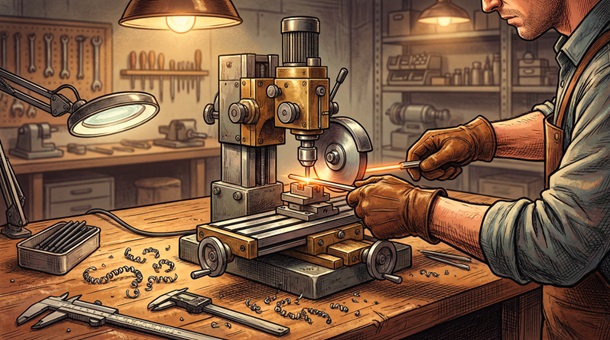
The process begins with a magnetizable material selected for the required magnetic strength, weight, durability, and cost. Thin stock may be stamped or cut into an elongated needle, while other designs form a magnetic bar or small magnet assembly that will be attached to a compass card. Burrs and rough edges are removed so they cannot interfere with balancing or movement.
Depending on the alloy, the part may be heat-treated to develop the desired hardness and magnetic properties. It is then cleaned and protected against corrosion. Paint or plating may be applied before or after magnetization, provided the coating does not disturb the dimensions or balance.
How is a compass needle magnetized? In industrial production, the part is placed in a controlled magnetic field produced by a magnetizing fixture, permanent magnet system, or energized coil. The field aligns magnetic domains within the material and establishes definite north-seeking and south-seeking poles. The field strength, orientation, and exposure must suit the alloy and part geometry.
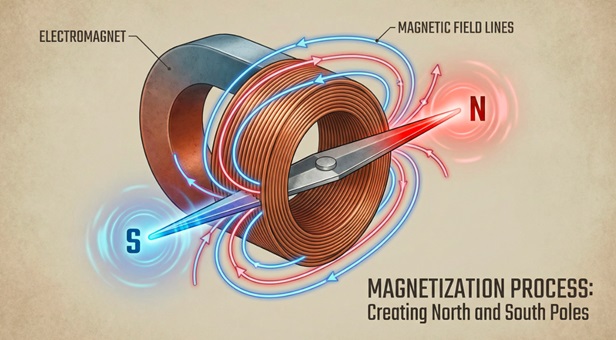
After magnetization, the polarity is checked and the north-seeking end is marked. The needle or card assembly is then balanced around its support. Manufacturers may remove small amounts of material, add a balancing mass, or choose a region-specific balance because the vertical component of Earth’s magnetic field changes with geographic location. Good balance reduces rubbing, sticking, and excessive tilt without turning this manufacturing stage into a broader explanation of magnetic dip.
Making the Housing
The housing must protect the moving system without introducing significant magnetic interference. A baseplate compass usually uses injection-molded polymers, while a marine bowl or precision instrument may combine molded parts, machined nonferrous metal, transparent covers, and gimbals. Production tools form the capsule, base, bezel, sighting features, filling ports, and seal surfaces to controlled dimensions.
The dial or compass card is marked with north, south, east, west, intermediate directions, and degree graduations. Markings may be printed, molded, etched, engraved, or laser-applied. Their angular spacing must be uniform, and the north mark must align correctly with the magnetic assembly. Luminous details may be added for low-light reading, using materials permitted for the intended market and application.
A hardened pivot is installed at the center of the housing or support structure. The matching bearing or jewel is fitted to the needle cap or compass-card assembly. The geometry must keep the rotating element centered, level enough for its design, and clear of the housing walls.
Assembling the Compass
Before assembly, internal parts are cleaned to remove metal particles, dust, grease, and fibers that could obstruct movement or contaminate the capsule. The dial, index line, pivot, bearing, needle, or compass-card assembly is installed in a fixture that protects the delicate support surfaces.
The technician or automated station checks that the moving element turns freely and does not touch the cover or walls. The north mark, magnetic poles, dial, and index line must have the correct relationship. If the design uses a rotating bezel, sighting mirror, lensatic case, baseplate, or marine bowl, those external parts are aligned and attached according to the product layout.
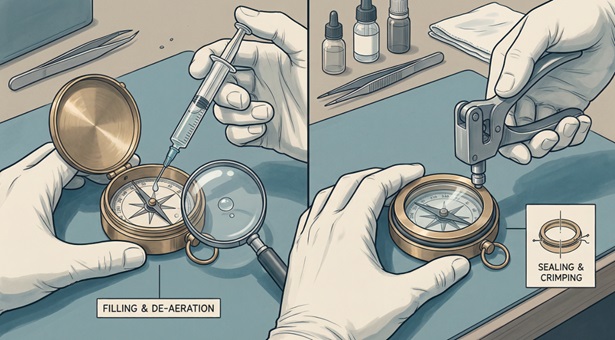
Liquid-filled compasses receive a transparent damping fluid chosen for the required viscosity, temperature range, compatibility with plastics and seals, and resistance to discoloration. Filling equipment introduces the liquid while controlling trapped air. Some designs use a flexible diaphragm, expansion chamber, or a deliberately managed gas space so the liquid can expand and contract with temperature without damaging the capsule.
The capsule is then closed with an O-ring, gasket, adhesive bond, welded polymer joint, crimped metal rim, or another sealing method. The correct method depends on the materials and expected exposure. Sealing is intended to prevent leakage and protect the interior, but the degree of water and dust resistance depends on the product specification rather than on the mere presence of a seal.
Dry compasses follow a different path: they skip the liquid-filling stage and may rely on air damping, mechanical restraints, or other methods. Once the internal and external assemblies are complete, each unit receives an initial movement, alignment, and appearance inspection before formal testing.
Quality Control and Factory Testing
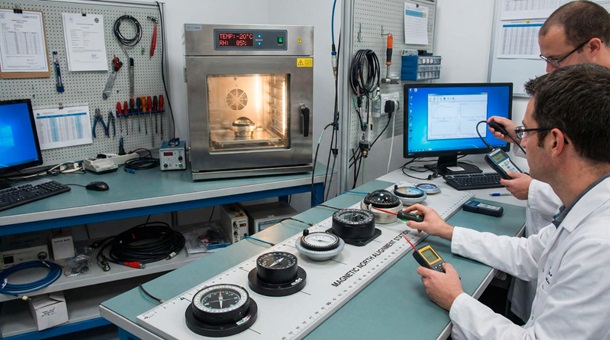
Quality control verifies that the finished compass meets its production specifications rather than merely appearing complete. The first checks confirm the magnetic element’s polarity and compare its indicated direction with a controlled magnetic reference. The inspector or automated station rotates the housing through known angles to detect dial misalignment, index error, excessive friction, sticking, or inconsistent response.
The needle or card must move freely and settle within the time and tolerance specified for the model. Its balance is checked so it does not drag or tilt excessively in the magnetic zone for which the compass was designed. Manufacturers also inspect the pivot, bearing, graduation quality, bezel operation, and the alignment among the magnetic element, north mark, dial, and fixed index line.
Liquid-filled capsules are examined for leaks, contamination, inappropriate bubbles, and changes caused by temperature. Professional, marine, military, or expedition models may undergo additional temperature cycling, vibration, impact, immersion, pressure, or environmental testing. Less expensive consumer products may instead be checked through automated stations and production sampling. Traceability records can connect a batch or unit with its materials, test results, and assembly line.
The Future of Compass Manufacturing
Compass manufacturing continues to improve through lighter impact-resistant polymers, more stable seals and damping fluids, safer luminous markings, better temperature compensation, and automated optical or magnetic testing. Electronic navigation devices increasingly combine a magnetometer with accelerometers, gyroscopes, software correction, and digital displays. Mechanical magnetic compasses nevertheless remain useful because they are simple, readable, and independent of batteries, satellite signals, and software. Future products will likely continue to pair durable traditional designs with more consistent manufacturing and factory verification.
Making a compass requires a magnetized and balanced needle or card, a precisely aligned dial, a low-friction support, and a protective housing that does not disturb the magnetic system. Liquid-filled designs add damping, expansion control, and leak-resistant sealing. After assembly, factory tests confirm that the compass moves freely, settles reliably, and meets its intended directional tolerance. The finished instrument may look simple, but dependable performance depends on careful material selection, controlled manufacturing, accurate assembly, and consistent quality control.
Learn more about compasses: